이전글
2024.04.28 - [Microsoft Defender XDR/MDI] - Microsoft Defender for Identity (MDI). (0) Introduction
아래의 기술자료를 기준으로 진행하겠습니다.
Quick installation guide - Microsoft Defender for Identity | Microsoft Learn
본격적으로 MDI 배포에 대해서 다루겠습니다.
1. MDI Sensor 설치
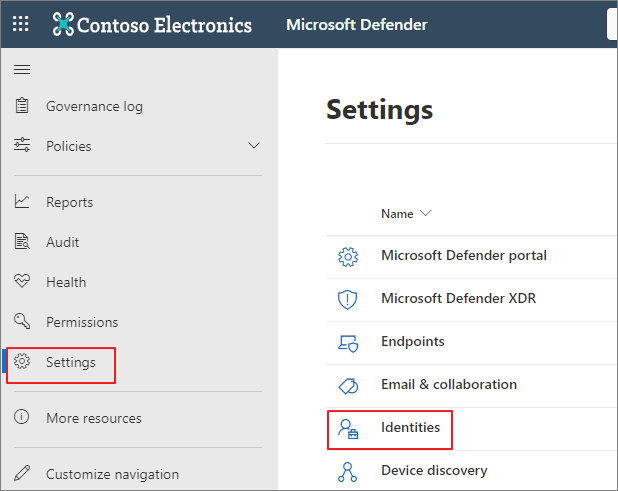
Microsoft Defender (https://security.microsoft.com) → Settings → Identities
프로비저닝 진행

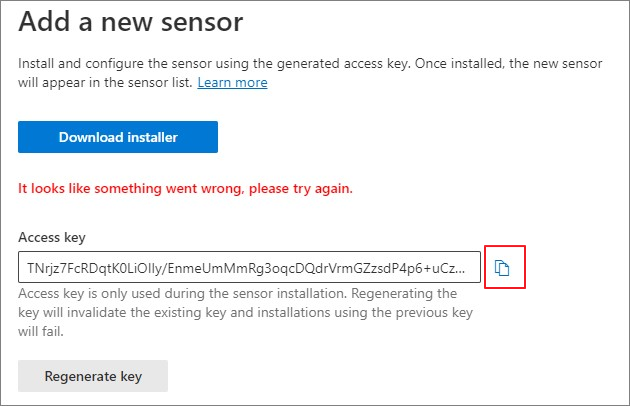
Sensors → Add sensor

Access key 복사 → Download installer → 설치 진행 (Domain Controller 및 ADFS 에서 진행)
다음

다음

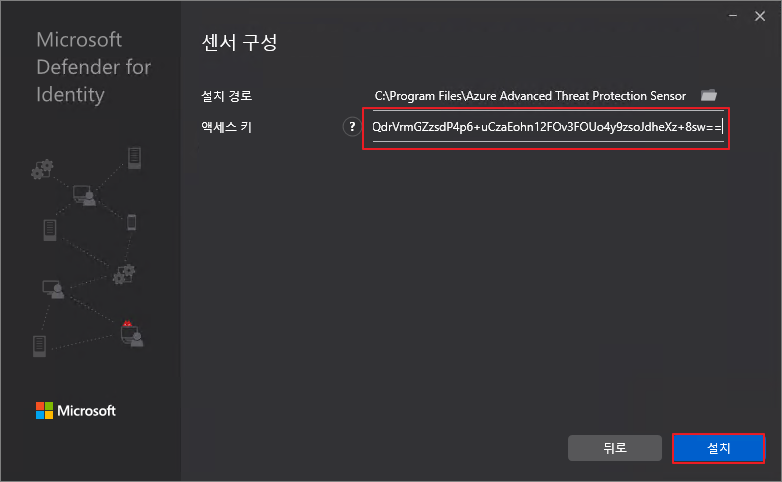
액세스 키 붙여넣기 → 설치
설치 진행중

마침

설치 상태 확인

2. Windows 이벤트 수집 구성
기술 자료
Configure audit policies for Windows event logs - Microsoft Defender for Identity | Microsoft Learn
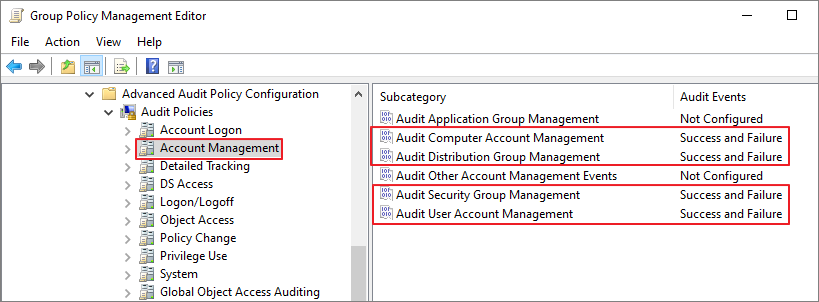
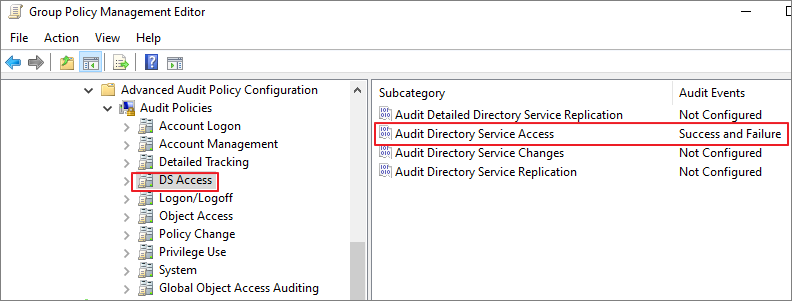
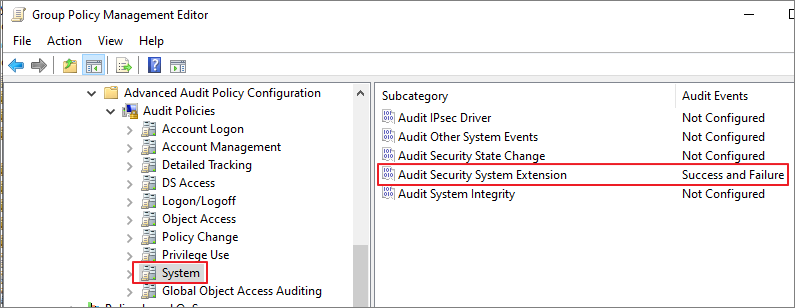
활성화 해야하는 감사 정책 및 수집해야 하는 Event ID는 다음과 같습니다.

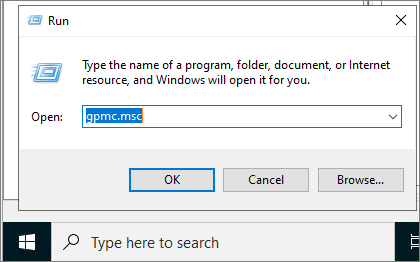
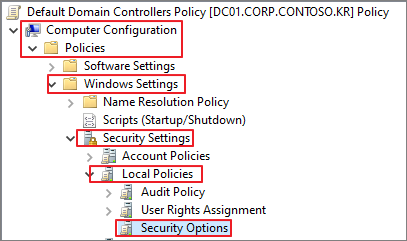
Domain Controller → gpmc.msc
Computer Configuration → Policies → Windows Settings → Security Settings → Advanced Audit Policy Configuration

Account Logon → Audit Credential Validation → Enable Logging

Account Management
DS Access
System
3. Configure NTLM auditing (Event ID 8004)
위와 동일하게 Default Domain Contoller 정책에서 수정합니다.
Computer Configuration → Policies → Windows Settings → Security Settings → Local Policies → Security Options
Network security: Restrict NTLM에서 아래의 정책 활성화

4. Configure domain object auditing
ADUC(DSA.msc) → 도메인 우클릭 → Properties

Security → Advanced

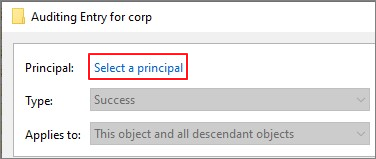
Auditing → Add

Select a principal
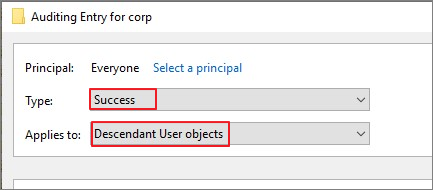
Everyone → OK

Success, Descendant User objects 선택
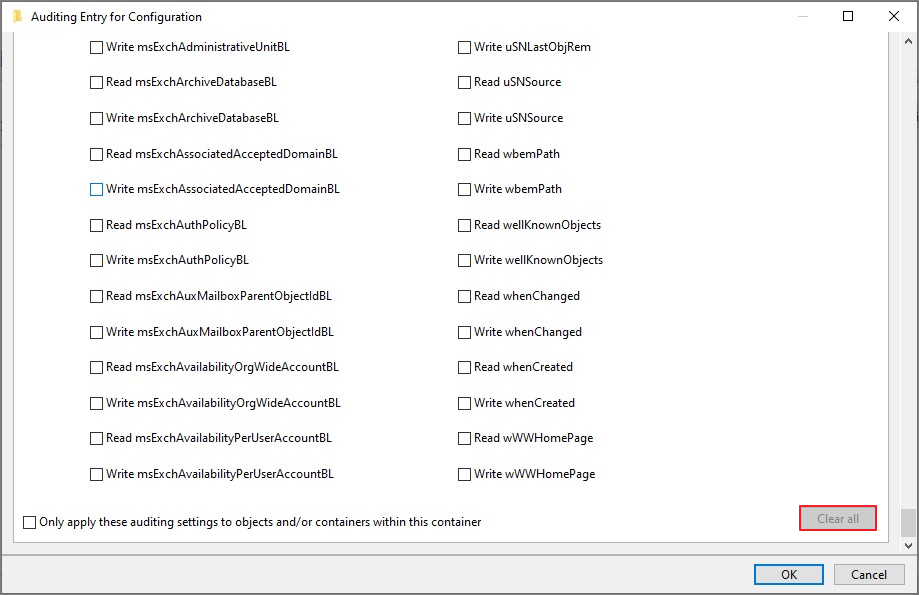
Clear all

Full control
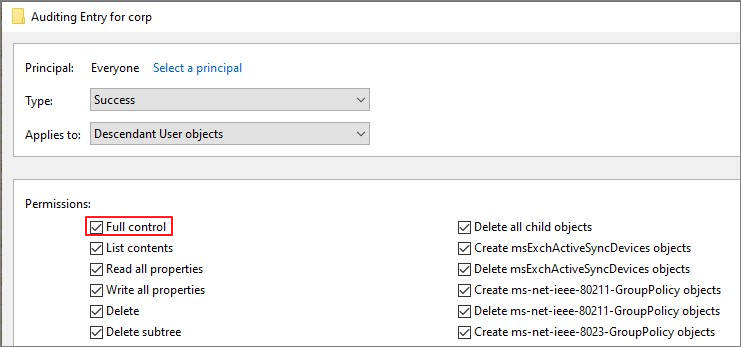
List contents, Read all properties, Read permissions 체크 해제 → OK → 권한생성 완료

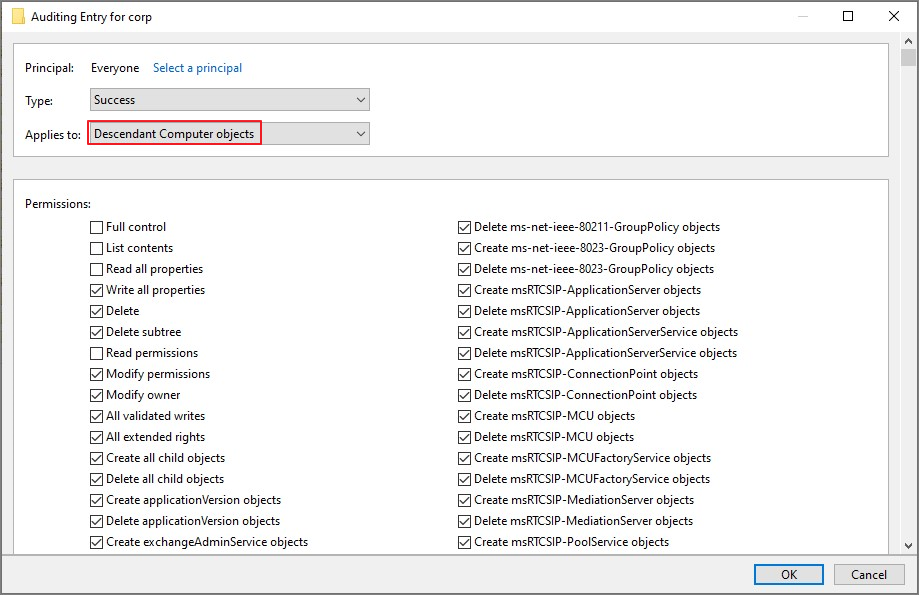
위에서 진행한 것과 같은 방식으로 Descendant Group object, Descendant Computer object, Descendant msDS-GroupManagedServiceAccount Objects, Descendant msDS-ManagedServiceAccount Objects 진행


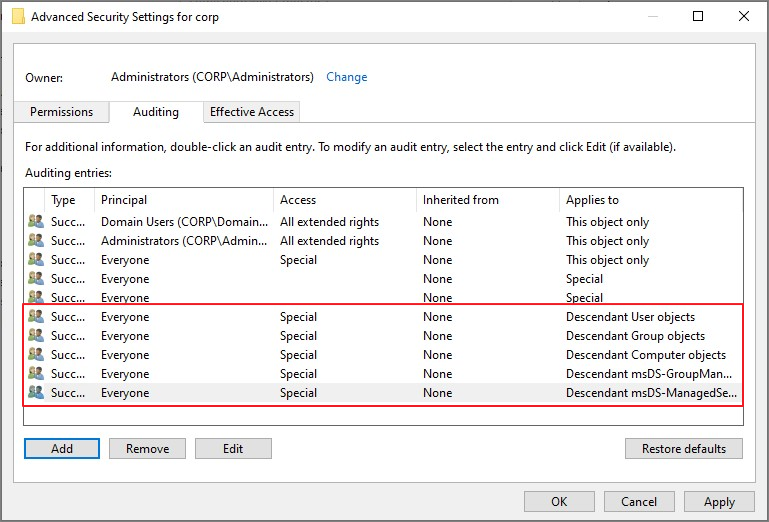
아래와 같이 추가된 권한 확인
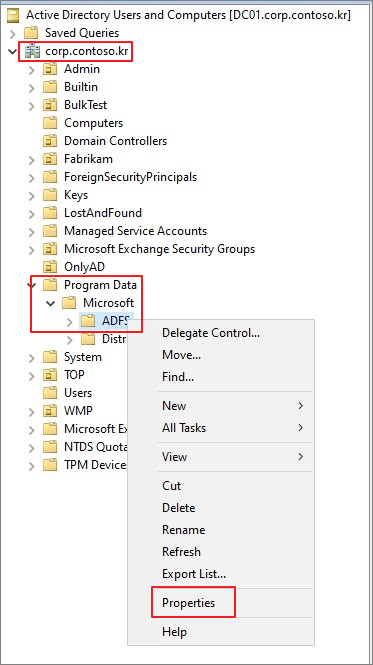
5. Enabling auditing on an ADFS object (ADFS 구성시)
ADUC → 도메인 → Program Data → Microsoft → ADFS → Properties
Security → Advanced
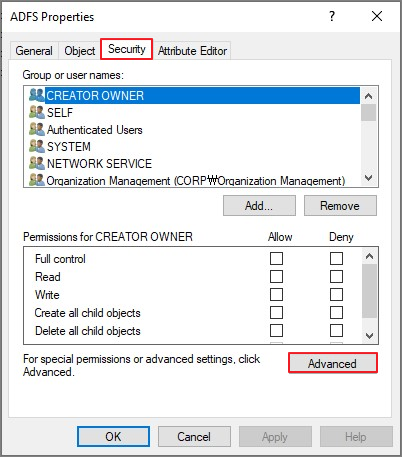
Auditing → Add

Everyone → This object and all descendant objects

Clear all

Read all properties, Write all properties 체크 → OK

추가된 권한 확인 → OK

6. Enable auditing on the Configuration container
Adsiedit.msc

Configuration → 우클릭 → Properties

Security → Advanced
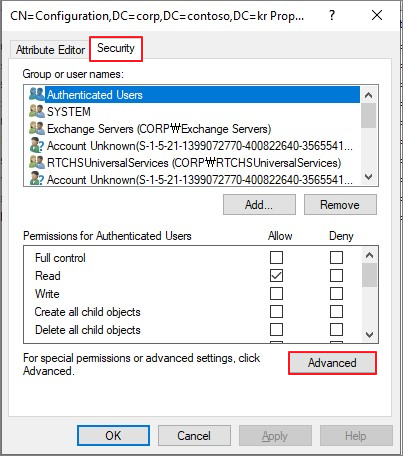
Auditing → Add

Everyone → This object and all descendant objects

Clear all
Write all properties → OK
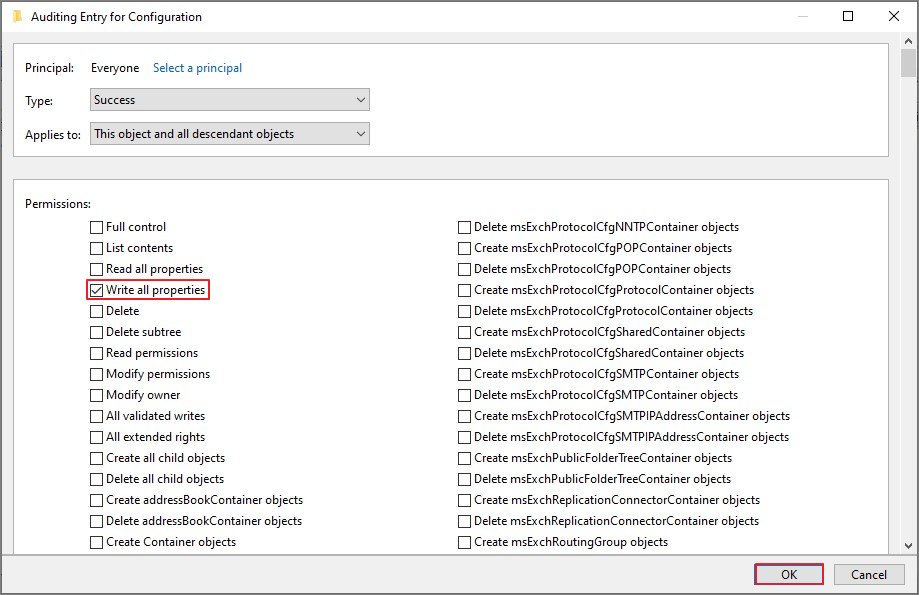
생성된 권한 확인 → OK

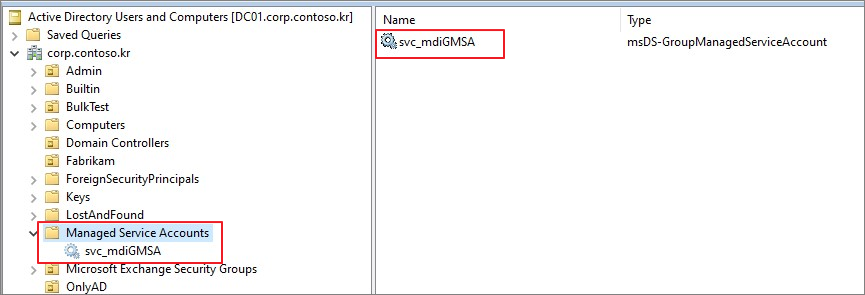
7. Create Service Account
Domain Controller에서 다음 PowerShell Script 를 실행 (환경에 맞게 수정해서 진행합니다.
 # Set Variables
$gMSA_AccountName = "svc_mdiGMSA" # INSERT PREFERRED NAME FOR GMSA
$gMSA_HostsGroupName = "gMSAGroup" # INSERT GROUP NAME TO ADD SERVERS TO
$gMSA_HostNames = "DC01", "DC02", "FS01" #, "ADCS02", "ADFS01", "ADFS02"
# Import Active Directory PowerShell module
Import-Module ActiveDirectory -Verbose
# Create the group and add the members
$gMSA_HostsGroup = New-ADGroup -Name $gMSA_HostsGroupName -GroupScope Global -PassThru
$gMSA_HostNames | ForEach-Object { Get-ADComputer -Identity $_ } |
ForEach-Object { Add-ADGroupMember -Identity $gMSA_HostsGroupName -Members $_ }
# Add Key Distribution Service (KDS) before start adding new group Managed Service Accounts
# If you have only one DC, then use this command to create the KDS root key and set start time in the past
Add-KdsRootKey –EffectiveTime ((get-date).addhours(-10))
# If you have multiple DCs, then use the command below to replicate immediately
Add-KdsRootKey -EffectiveImmediately
# Create gMSA
New-ADServiceAccount -Name $gMSA_AccountName `
-DNSHostName "$gMSA_AccountName.$env:USERDNSDOMAIN" `
-PrincipalsAllowedToRetrieveManagedPassword $gMSA_HostsGroupName

gMSAGroup 확인

Service Account 확인
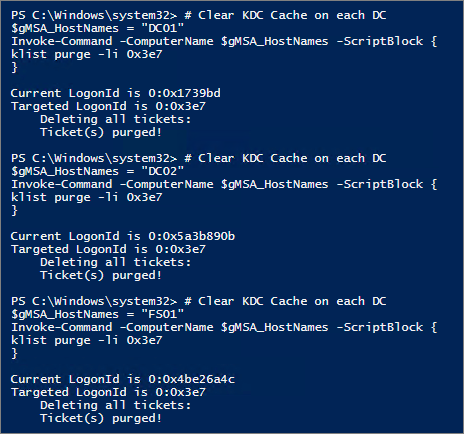
 # Clear KDC Cache on each DC
$gMSA_HostNames = “DC01"
Invoke-Command -ComputerName $gMSA_HostNames -ScriptBlock {
klist purge -li 0x3e7
}
각 DC/ADFS에서 Service Account 설치

Deleted Objects Containers에 필요한 읽기 권한을 부여
 # Declare the identity that you want to add read access to the deleted objects container:
$Identity = 'svc_mdiGMSA'
# If the identity is a gMSA, first to create a group and add the gMSA to it:
$groupName = 'gMSAGroup'
$group = (Get-ADGroup -Identity gMSAGroup).name
# Get the deleted objects container's distinguished name:
$distinguishedName = ([adsi]'').distinguishedName.Value
$deletedObjectsDN = 'CN=Deleted Objects,{0}' -f $distinguishedName
# Take ownership on the deleted objects container:
$params = @("$deletedObjectsDN", '/takeOwnership')
C:\Windows\System32\dsacls.exe $params
# Grant the 'List Contents' and 'Read Property' permissions to the user or group:
$params = @("$deletedObjectsDN", '/G', ('{0}\{1}:LCRP' -f ([adsi]'').name.Value, $Identity))
C:\Windows\System32\dsacls.exe $params

# To remove the permissions, uncomment the next 2 lines and run them instead of the two prior ones:
# $params = @("$deletedObjectsDN", '/R', ('{0}\{1}' -f ([adsi]'').name.Value, $Identity))
# C:\Windows\System32\dsacls.exe $params
다음 그룹 정책에 생성한 서비스 계정 추가
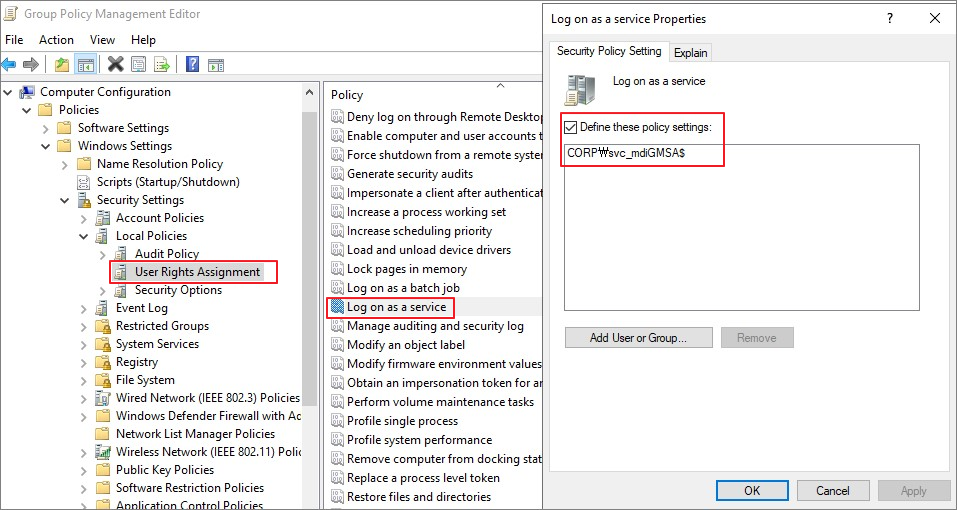
8. Add Service Account
Directory services accounts → Add credentials

Group Managed service account 추가

9. Configure ADFS
ADFS 머신에서 Audit 활성화

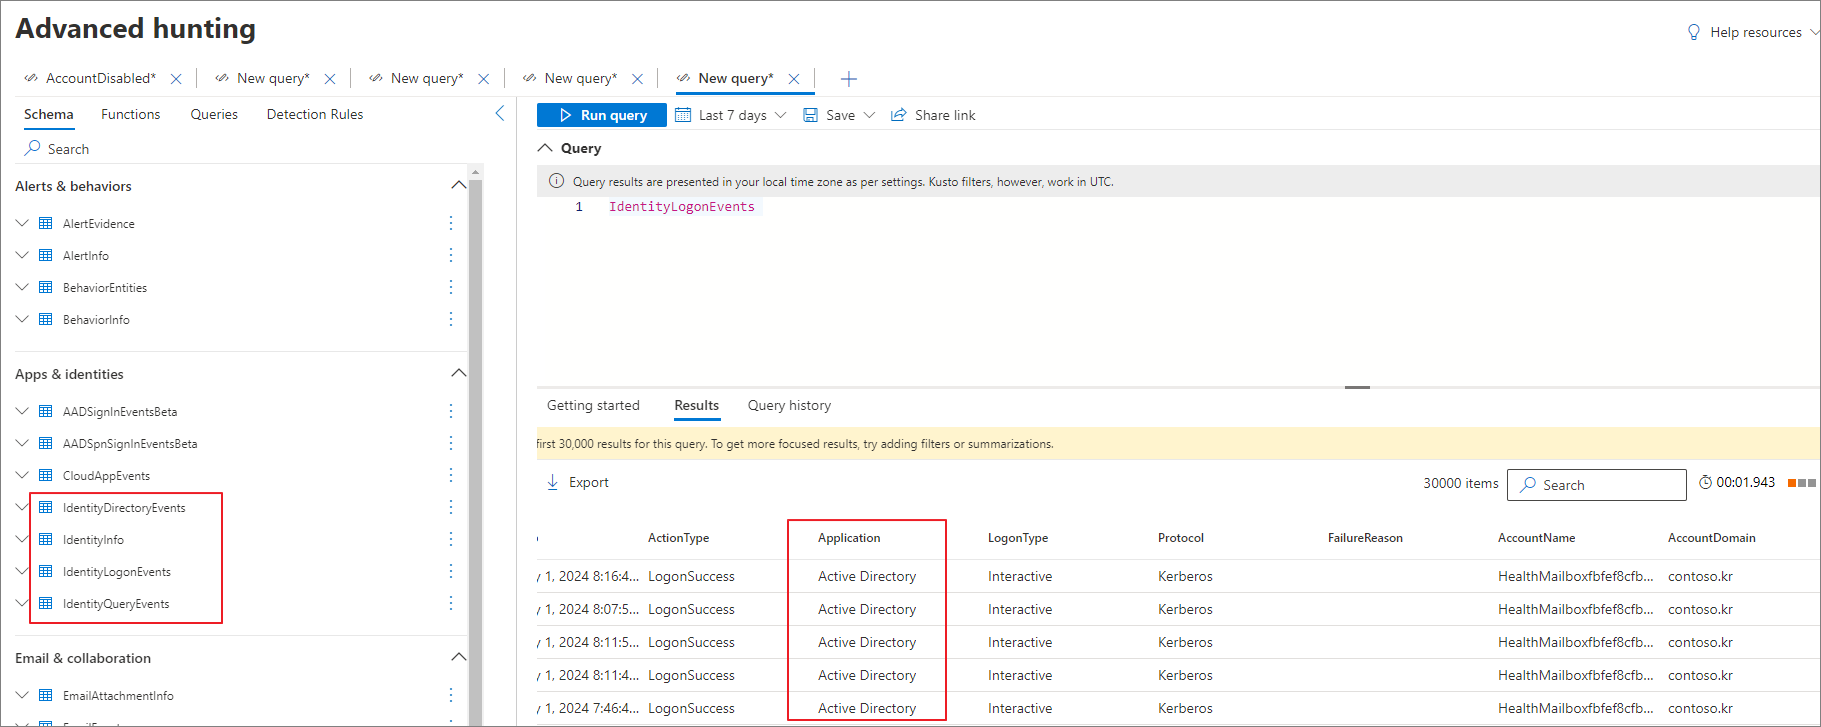
구성이 완료되면 아래와 같이 Advanced hunting에서 Identity와 관련된 기록이 조회되는 것을 확인할 수 있습니다.
다음 포스팅에서는 MDI에서 어떠한 내용들을 확인할 수 있는지 포스팅하겠습니다.
다음글
2024.05.26 - [Microsoft Defender XDR/MDI] - Microsoft Defender for Identity (MDI). (2) Log 분석
'Microsoft Defender XDR > MDI' 카테고리의 다른 글
| Microsoft Defender for Identity (MDI). (2) Log 분석 (0) | 2024.05.26 |
|---|---|
| Microsoft Defender for Identity (MDI). (0) Introduction (0) | 2024.04.28 |
| Deploy Microsoft Defender for Identity (MDI) (2). Lab Setup (2) | 2022.09.14 |
| Deploy Microsoft Defender for Identity (MDI) (1). Configuration (0) | 2022.09.06 |