아래의 자료를 참고하여 진행하였습니다.
Enrollment for hybrid Azure AD-joined devices - Windows Autopilot | Microsoft Docs
이 포스팅은 Hybrid Azure AD Join은 이미 구성했다는 전제로 작성되었습니다.
[Step 1] Prerequisites
사전 요구사항을 정확하게 확인 후 진행해야 합니다.
| OS Use Windows 11 or Windows 10 version 1809 or later. -> Windows 10 1809 이후 버전이어야 합니다. Network Have access to the internet following Windows Autopilot network requirements. 인터넷이 가능해야합니다. Have access to an Active Directory domain controller. The device must be connected to the organization's network so that it can: DC와 연결 가능한 네트워크 대역대에 있어야 합니다. Resolve the DNS records for the AD domain and the AD domain controller. DHCP 설정을 통해서 DNS는 DC로 지정되어 있어야 합니다. Communicate with the domain controller to authenticate the user. AD 사용자로 DC와 통신이 이루어져야 합니다. Successfully ping the domain controller of the domain you're trying to join. DC에 Ping이 전달되어야 합니다. -> 이 부분으로 연결 가능 여부가 판별됩니다. If using Proxy, WPAD Proxy settings option must be enabled and configured. OOBE Undergo the out-of-box experience (OOBE). Sysprep 을 진행해야 합니다. Use an authorization type that Azure Active Directory supports in OOBE. Azure Active Directory가 OOBE에서 지원하는 권한 부여 유형을 사용합니다. |
[Step 2] Set up Windows automatic enrollment
Azure Portal -> Mobility (MDM MAM) -> Microsoft Intune

None 으로 설정 되어 있다면, Some 이나 All 로 변경합니다.

[Step 3] Increase the computer account limit in the Organizational Unit
Autopilot을 통해서 Computer가 등록될 때, AD에 Computer 개체가 생성되어야 합니다. 사전에 OU를 생성해야 합니다. 또한 Intune Connector의 머신이 컴퓨터 개체를 생성할 수 있는 권한을 가지고 있어야 합니다.
저는 HAAD\Computers OU에 생성할 예정입니다. (Azure AD Connect 에서 해당 OU를 동기화 해줘야 합니다.)
HAAD OU를 우클릭 -> Delegate Control

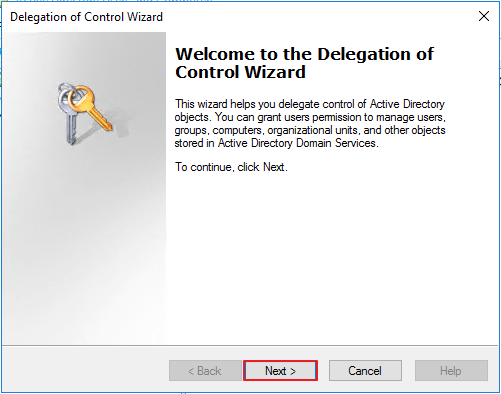
Next
Add

Object Types 를 클릭합니다.
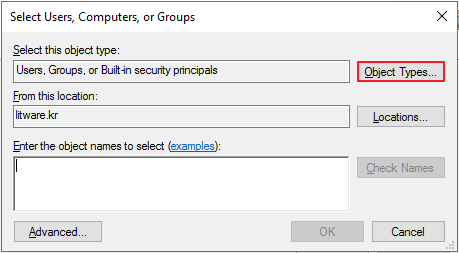
Computers 만 체크한 뒤, OK를 클릭합니다.

Intune Connector가 설치된 머신을 입력합니다. 저는 Azure AD Connector 머신에 같이 설치하였습니다.

Next

Create a custom task to delegate -> Next

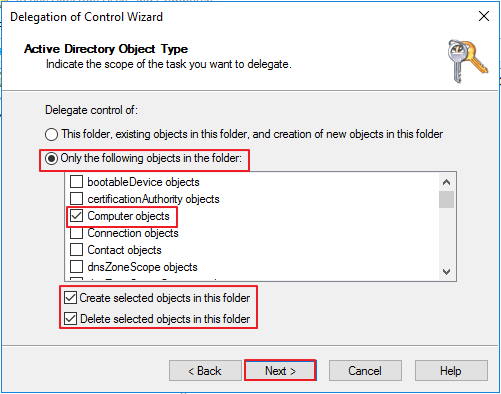
Computer object를 생성할 수 있도록 아래와 같이 체크 합니다.
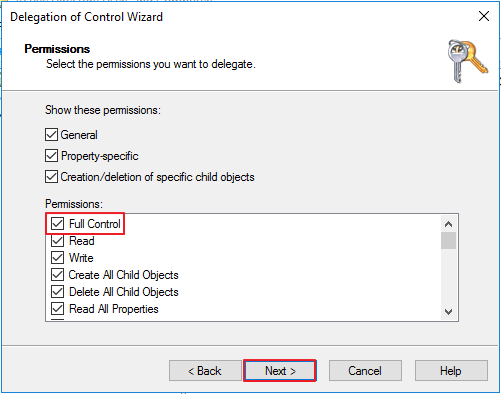
Full Control -> Next
Finish

[Step 4] Install the Intune Connector
Intune Connector 설치하기 전에 몇가지 확인해야 할 사항이 있습니다.
| The Intune Connector for Active Directory must be installed on a computer that's running Windows Server 2016 or later. OS는 Windows Server 2016 이상이어야 합니다. The computer must have access to the internet and your Active Directory. Internet 과 AD에 Access가 가능해야 합니다. To increase scale and availability, you can install multiple connectors in your environment. We recommend installing the Connector on a server that's not running any other Intune connectors. Each connector must be able to create computer objects in any domain that you want to support. 고가용성 개념으로 여러 머신에 설치할 수 있습니다. 그리고 공식자료에는 나와 있지 않지만, 시스템 로캘이 English로 되어 있어야 한다고 합니다. |
Intune Connector 머신에서 IE Enhanced Security Configuration 을 Off 로 변경합니다.

Microsoft Endpoint Manager admin center (MEM Admin Center) -> Devices -> Windows

Windows Enrollment -> Intune Connector for Active Directory
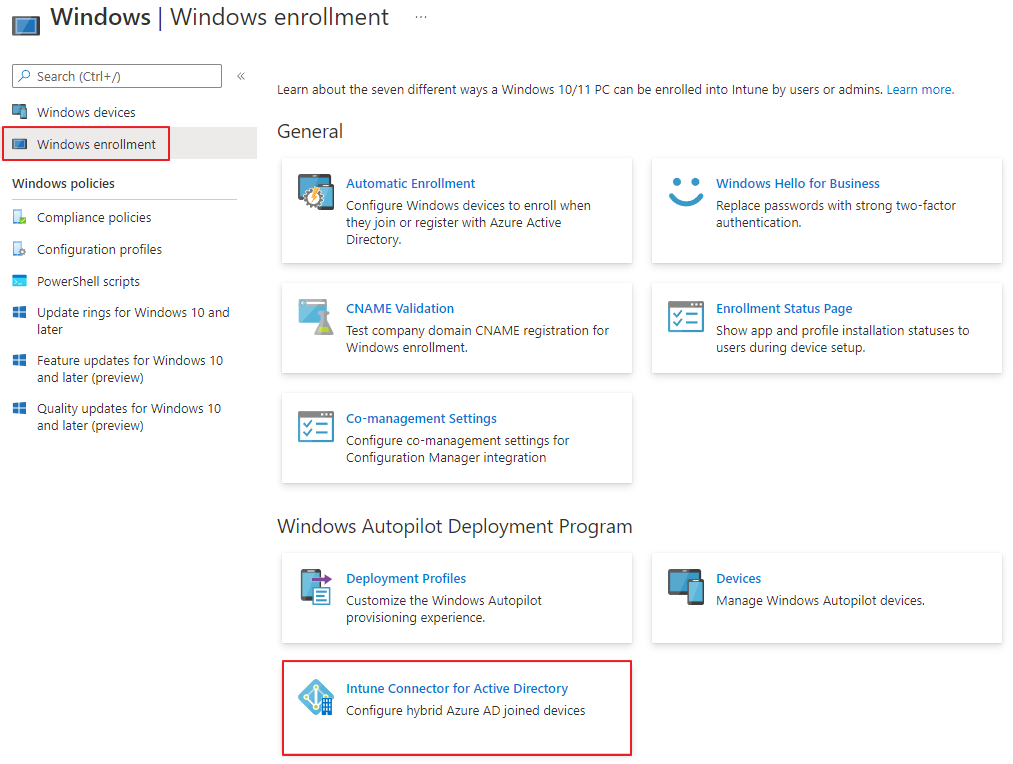
Add -> Download the on-premises Intune Connector for Active Directory -> 해당 파일을 Intune Connector 대상 머신에 설치합니다.

Install

Configure Now
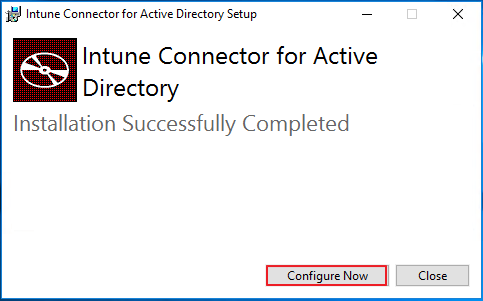
Sign in
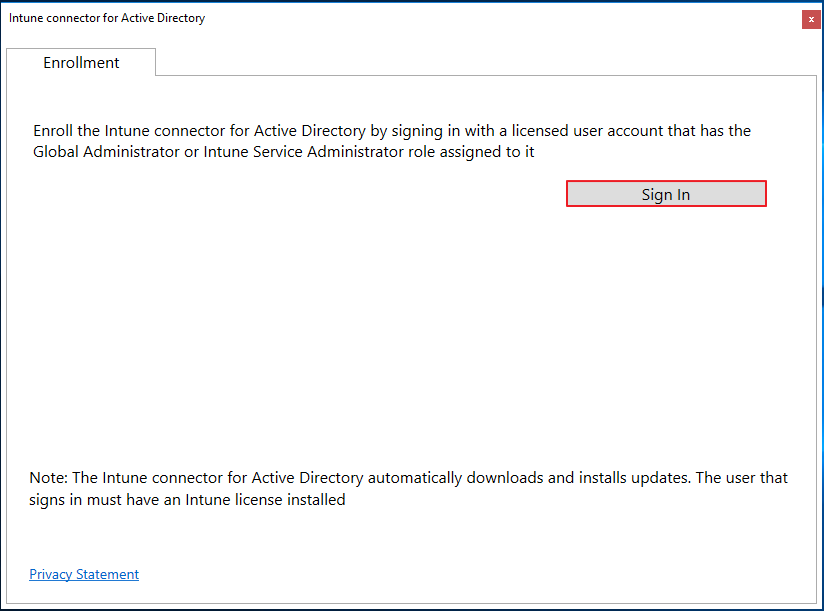
관리자 계정 or Intune 관리자 역할 계정으로 로그인 합니다.

OK

등록이 완료되면, 다음과 같이 나타납니다.

그리고 Intune Connector for Active Directory 메뉴에서도 올바르게 등록되었는지를 확인합니다.

[Step 5] Create a device group
Autopilot 대상 Device 를 구분할 동적 그룹을 생성해야 합니다.
Groups -> New Group

Dynamic Device 을 선택한 뒤, Add dynamic query

Edit

아래의 내용을 입력합니다.
(device.devicePhysicalIDs -any _ -contains "[ZTDId]")

-> Autopilot에 등록된 장치를 구분하는 규칙입니다.
구문을 확인 한 뒤, Save 를 클릭합니다.

Create

[Step 6] Register your Autopilot devices
반드시 장치를 등록해야만 Autopilot을 사용할 수 있으며, 등록 방법에는 몇가지 옵션이 있습니다.
1. OEM 제조사가 등록
OEM 제조사가 테넌트와의 관계 수락을 통해서 등록하는 프로세스가 있습니다. 실제 운영환경이라면 아래의 기술자료를 참고하여 제조사에 문의합니다.
Windows Autopilot OEM registration process | Microsoft Docs
2. 관리자가 수동 등록
아래의 자료를 확인해보면 관리자는 수동으로 하드웨어 해시를 캡처해서 등록해야 한다고 언급되어 있습니다. 자동 등록은 제조사나 CSP파트너사에 문의해야합니다.
Manual registration of devices for Windows Autopilot | Microsoft Docs
| To manually register a device, you must first capture its hardware hash. Once this process has completed, the resulting hardware hash can be uploaded to the Windows Autopilot service. 장치를 수동으로 등록하려면 먼저 하드웨어 해시를 캡처해야 합니다. 이 프로세스가 완료되면 결과 하드웨어 해시를 Windows Autopilot 서비스에 업로드할 수 있습니다. Customers can only register devices with a hardware hash. Other methods (PKID, tuple) are available through OEMs or CSP partners as described in the previous sections. 고객은 하드웨어 해시로만 장치를 등록할 수 있습니다. 다른 방법(PKID, 튜플)은 이전 섹션에서 설명한 대로 OEM 또는 CSP 파트너를 통해 사용할 수 있습니다. |
아래의 자료를 참고하여 해시 등록작업을 진행해 보겠습니다.
Manually register devices with Windows Autopilot | Microsoft Docs
A) Windows 10 OOBE 단계에서 등록하는 방법 (개인적으로는 이 방법이 가장 편리한 것 같습니다.)
OOBE 단계 화면에서 Shift + F10 를 입력합니다.

아래의 명령어를 입력합니다.
PowerShell.exe -ExecutionPolicy Bypass
Install-Script -name Get-WindowsAutopilotInfo -Force
Set-ExecutionPolicy -Scope Process -ExecutionPolicy RemoteSigned
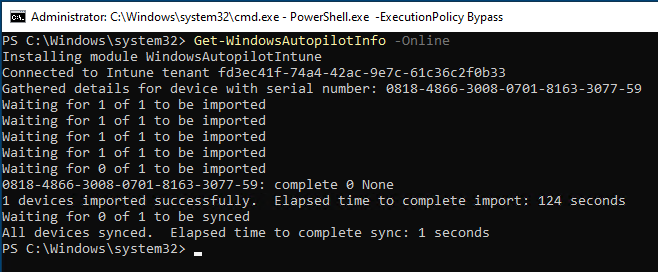
Get-WindowsAutopilotInfo -Online
관리자 or Intune 관리자 계정을 입력합니다.

Accept

아래와 같이 전송 작업이 진행됩니다.
MEM admin Center -> Devices -> Windows -> Windows enrollment -> Devices
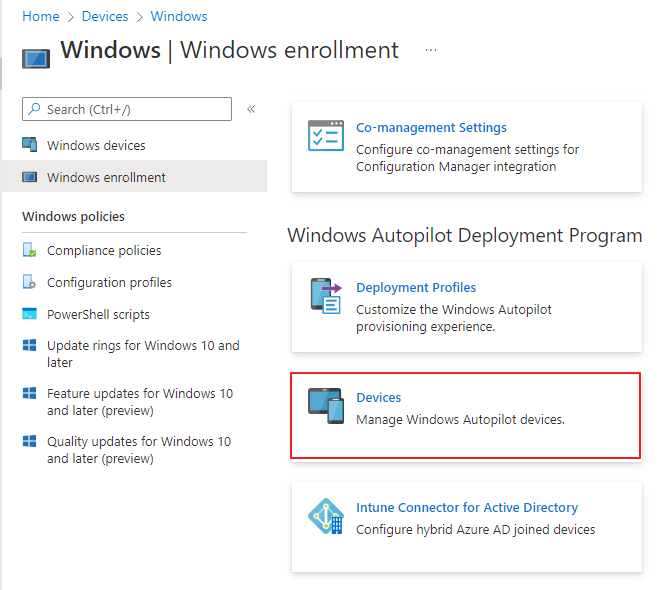
아래와 같이 등록되는 것을 확인할 수 있습니다.

B) 부팅 이후 단계에서 CSV 파일로 내보내기
이미 사용 중인 PC에 대해서 장치 등록을 진행하려면 아래의 방법이 적합할 수 있습니다.
Powershell 을 관리자 권한으로 실행합니다.

아래의 명령어를 실행합니다.
New-Item -Type Directory -Path "C:\HWID"
Set-Location -Path "C:\HWID"
$env:Path += ";C:\Program Files\WindowsPowerShell\Scripts"
Set-ExecutionPolicy -Scope Process -ExecutionPolicy RemoteSigned
Install-Script -Name Get-WindowsAutopilotInfo
Get-WindowsAutopilotInfo -OutputFile AutopilotHWID.csv
아래와 같이 CSV 파일이 생성됩니다.

Autopilot 관리 메뉴에서 Import 를 진행합니다.

아래와 같이 등록이 완료되었습니다.

C) Windows 11 - Windows Autopilot Diagnostic Page
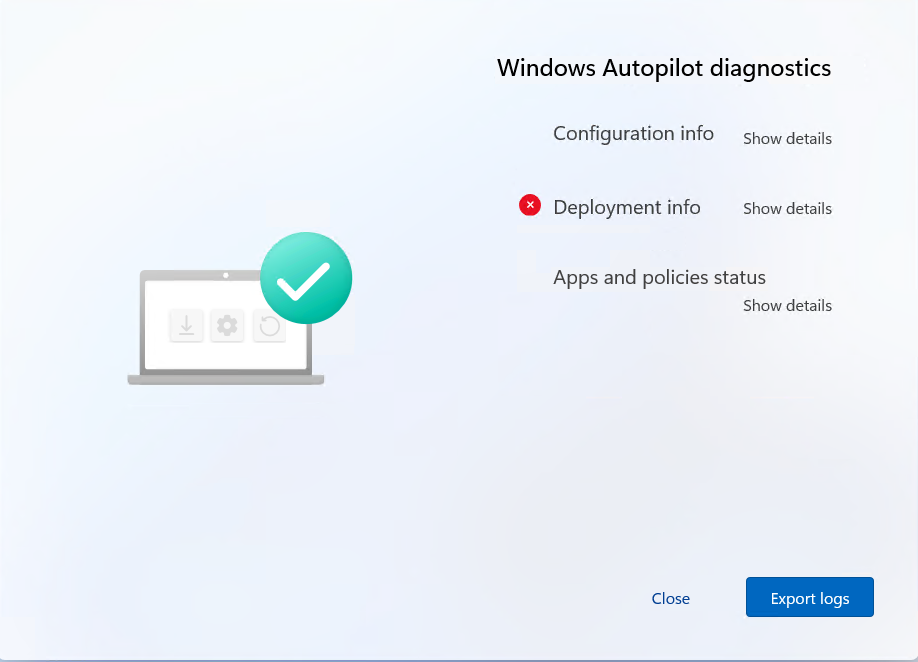
OOBE 단계에서 Ctrl + Shift + D 키를 입력합니다.
Windows Autopilot diagnostics 페이지로 이동 되며, Export logs를 클릭합니다.
아래와 같이 내보내기 위치를 지정할 수 있습니다. (네트워크 위치 경로 지정이 가능할 경우 적합할 것으로 보입니다.)

내보낸 경로를 확인하면 아래와 같이 zip파일을 확인할 수 있습니다.

압축을 해제한 뒤 Devicehash CSV 파일을 MEM Admin Center에 업로드합니다.

아래와 같이 추가되는 것을 확인할 수 있습니다.

[Step 7] Create and assign an Autopilot deployment profile
Windows enrollment -> Deployment profiles

Create profile -> Windows PC

프로필 이름 지정 -> Next

Hybrid Azure AD Joined 를 선택합니다. 그리고 Skip AD Connectivity check는 반드시 No 로 설정합니다. (해당 옵션은 VPN 연결시에만 사용합니다.)
저는 Standard User Type으로 진행하였습니다.

이전에 생성한 동적 디바이스 그룹을 지정합니다.

Create

[Step 8] (Optional) Turn on the enrollment status page
아래의 과정은 선택 사항입니다. 등록되는 과정을 화면에 표시해주는 설정입니다.
Enrollment Status Page

정책 선택

Properties -> Settings -> Edit

Yes 로 변경 -> Revew + Save

[Step 9] Create and assign a Domain Join profile
MEM Admin Center -> Devices -> Configuration profiles -> Create Profile

아래와 같이 선택 -> Create

정책 이름 입력 -> Next


아래와 같이 정보를 입력합니다.
Computer name prefix: 최초 Join시 설정할 이름
Domain name: AD Domain
Organizational unit: computer 개체를 생성할 위치
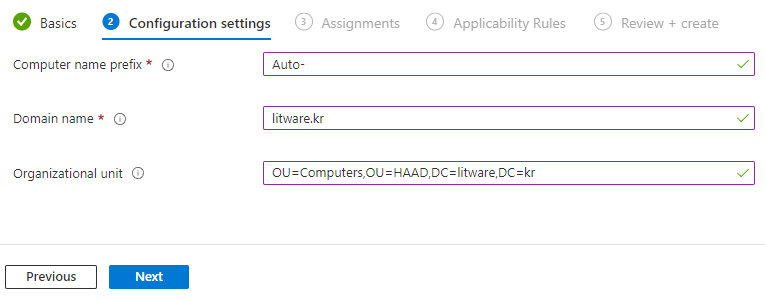
참고로 OU는 반드시 DN 값을 입력해야 합니다.

생성한 동적 디바이스 그룹을 지정

Create

[Step 11] CSP to Disable User Setting in ESP
이 단계는 기술자료에서는 언급되어 있지 않습니다.
다만 시간 초과 관련된 오류가 발생할 경우 해당 설정이 필요할 수 있습니다.
https://www.anoopcnair.com/windows-autopilot-hybrid-domain-join-guide/
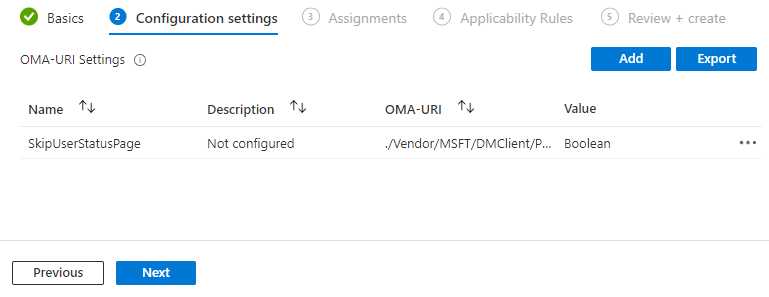
Configuration profiles -> Create profile

Add

Name:SkipUserStatusPage
OMA-URI: ./Vendor/MSFT/DMClient/Provider/MS DM Server/FirstSyncStatus/SkipUserStatusPage
Data type: Boolean
Value: True

Next
동적 Device 그룹을 추가합니다.

Create

[Step 12] GPO 등록
Domain Join, MDM 관련 GPO를 아래와 같이 활성하였습니다. 이부분 역시 기술자료에는 없으므로 선택 사항입니다.
Intune 커넥터와 연결된 OU에만 등록하였습니다.


[Step 13] Test
Sysprep 된 이미지로 테스트를 진행해 보겠습니다.
부팅이 진행됩니다.

OOBE 단계 진입 -> Shift + F10

OEM Hash 등록 작업 절차 진행

Assign 되지 않은 정보를 확인할 수 있습니다. OOBE 단계에서 바로 재부팅합니다.

그리고 Azure Portal -> Device에서 아래와 같이 표시됩니다.

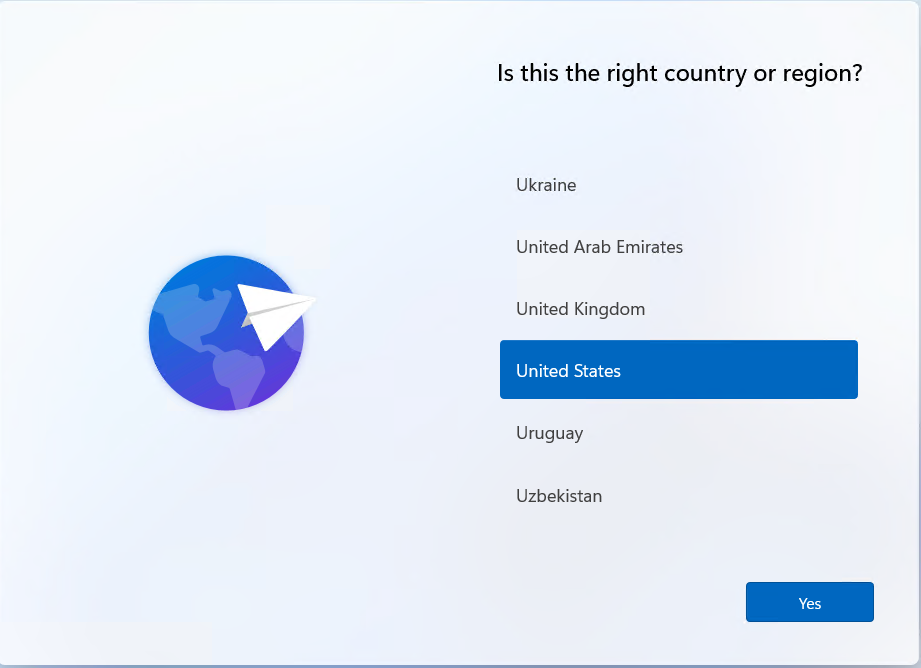
국가 및 언어 선택 창이 나타나지 않고 바로 네트워크 검색을 진행합니다.

계정을 입력합니다.

패스워드를 입력합니다.

사용자 계정이 맵핑된 것을 확인할 수 있으며, 아직까지는 Azure AD Joined 상태입니다.

다음과 같이 화면이 나타나며, 잠시 후에 재부팅이 진행됩니다.

Azure Portal에서는 아래와 같이 Computer Name 이 맵핑되며, Intune 등록으로 변경됩니다.

Autopilot이 진행됩니다.
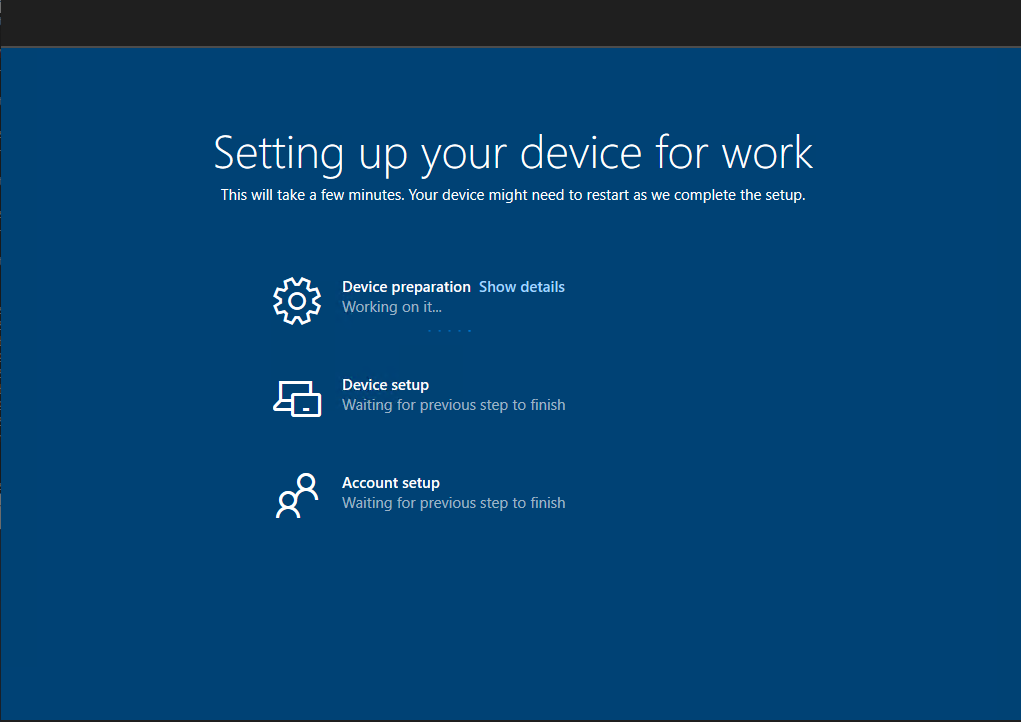
재부팅이 진행된 뒤, 아래와 같이 AD Login 형태로 변경된 것을 확인할 수 있습니다.

Azure AD Connect Sync가 진행되어 개체정보가 반영되면, 아래와 같이 Hybrid Azure AD join 형태의 정보를 확인할 수 있습니다.
[dsregcmd /status]

Azure Portal에서 Hybrid Azure AD Join 형태로 기록 됩니다

그리고 Autopilot device 목록에도 정보들을 확인할 수 있습니다.

'Microsoft 365 > Intune' 카테고리의 다른 글
| M365. Azure AD Joined Plan (5). Update rings for Windows 10 and later (0) | 2022.07.12 |
|---|---|
| M365. Azure AD Joined Plan (4). Configuration Profiles (0) | 2022.07.12 |
| M365. Azure AD Joined Plan (3). Conditional Access (0) | 2022.07.11 |
| M365. Azure AD Joined Plan (2). Compliance Policy (0) | 2022.07.11 |
| M365. Azure AD Joined Plan (1). Windows device enrollment (0) | 2022.07.11 |
